Are you looking for a picture-perfect solution to import PST files to Office 365? If yes, then this is the correct page. In this blog, users will learn everything, such as why this migration process is necessary and how to begin the task. Moreover, users have become very impatient, and since Microsoft introduced Office 365, many users have wished to switch their emailing platform. Office 365 has gained so much popularity that every user is eager to proceed with this migration task.
Why should users import PST files into Office 365?
Outlook PST and Office 365 are emailing platforms, and many users rely on these email clients. Both are Microsoft products, and because of that, most organizations prefer these two Microsoft products. Ever since Microsoft has Office 365, users wish to shift their data from PST to Office 365. Office 365 has developed more advanced security features that provide proper security to user data. Here, we share some amazing benefits showing why users should import PST files into Office 365.
- One of the prime reasons users switch their data to Office 365 is its subscription plan. With this, users can purchase the storage capacity and save more data. It is beneficial for most organizations that store huge amounts of data daily.
- Office 365 is widely accessible to every user, and users can access their data from different systems or places.
- It is very easy to set up Office 365, as just after setting up Office 365, users will be able to install it smoothly. For that reason, users are asked to import PST to Office 365 immediately.
- Office 365 is a collaboration platform, as users are aware of it. Users can easily manage their data in it. They can edit the files, communicate, etc., whenever they want.
- By shifting the data to Office 365, users will not face any data loss and will keep their data protected.
- The Microsoft 365 will keep the platform updated whenever any new update is launched. Users do not have to wait until there is any new update, as it will be done automatically without glitches.
Which method is best for migration?
If users want immediate results on the task, they are asked to go with a professional third party tool. However, the traditional method, i.e., the manual method, is also available for users to commence the task. Now, it is up to the users to choose which method to begin this migration task. However, to make it easy, we will share the workings of both methods in the following paragraph. Go through every step and quickly proceed using your preferred method.
Import PST Files to Office 365 using the traditional method
The manual method is the old migration method; every user relied on this method only as it was the only way. With the manual method, users must be technical experts with all the IT knowledge, as the technique involves many technicalities. To commence the task below, we are sharing the systematic procedure, so go through it.
Method 1- Import PST File to Office 365 with Azure AzCopy tool
- Open the Microsoft admin centre and visit the data lifecycle management option.
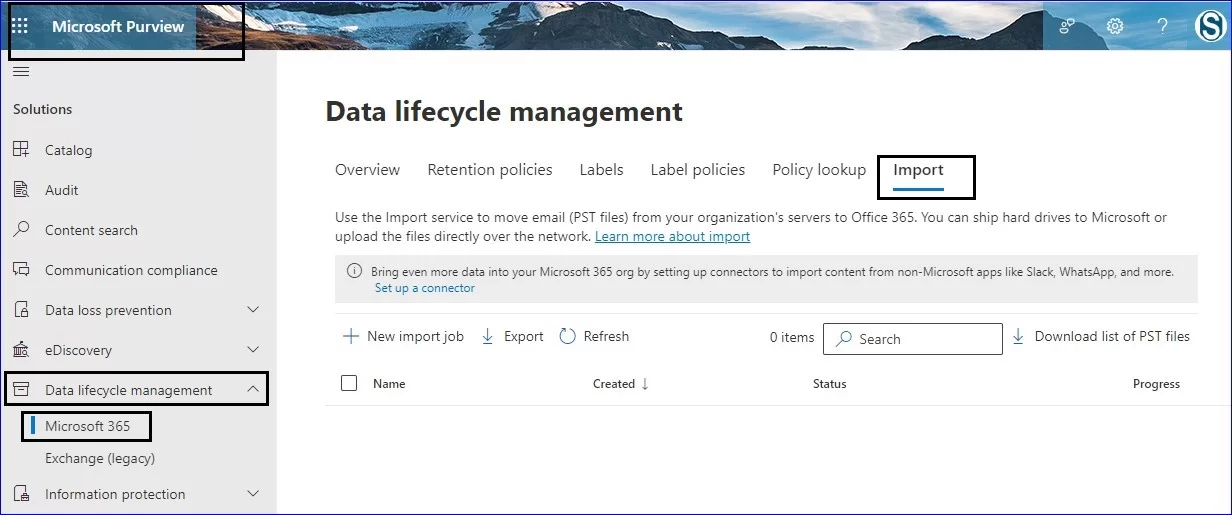
- After that, hit the Microsoft 365 option and click on the import button.
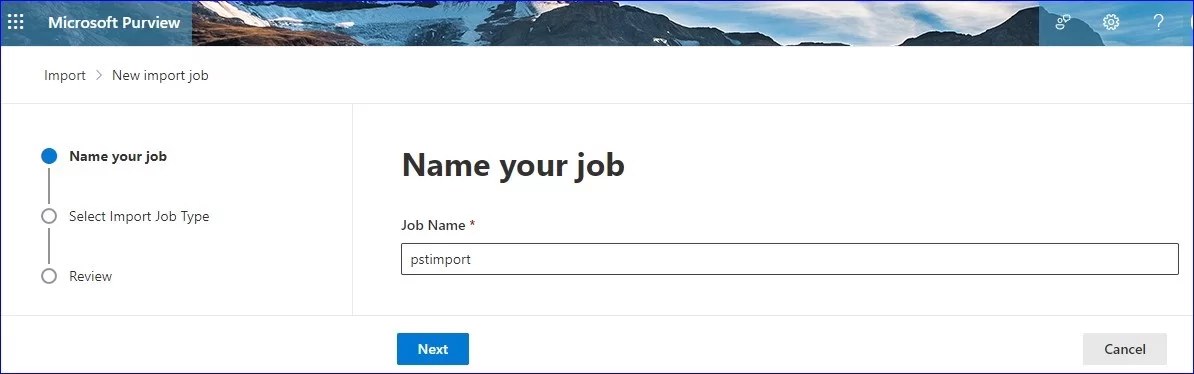
- Post that, create a new import job, and give a name to your new job, then hit the Next button.
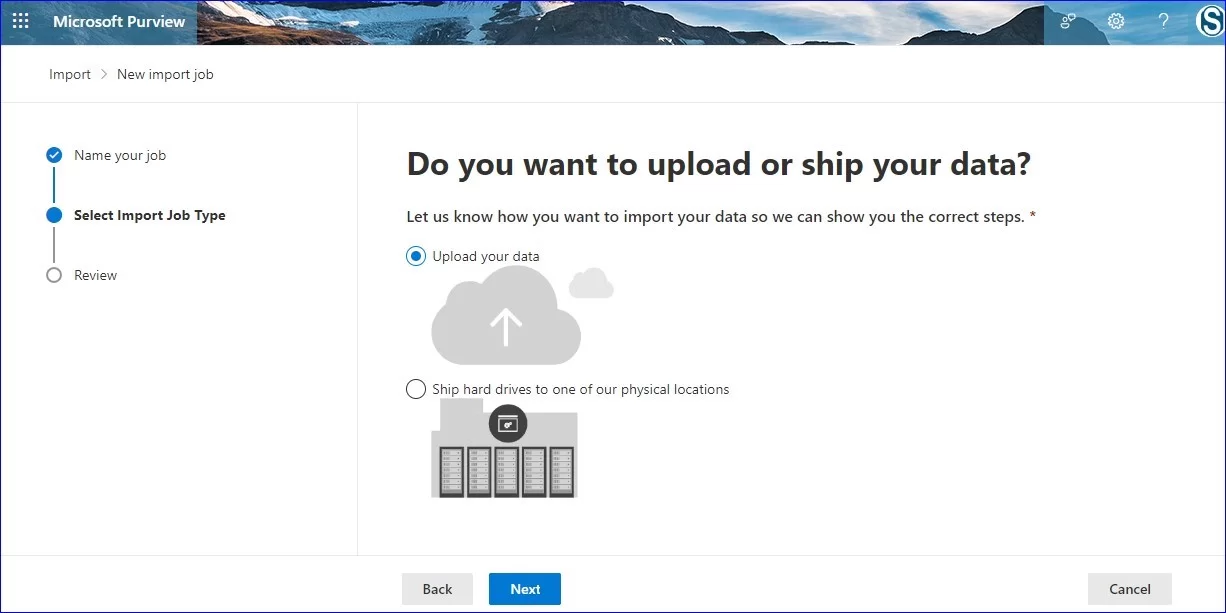
- Afterward, choose the import type, and then you will get two options, i.e., upload your data and ship the hard drive to one of our physical locations.
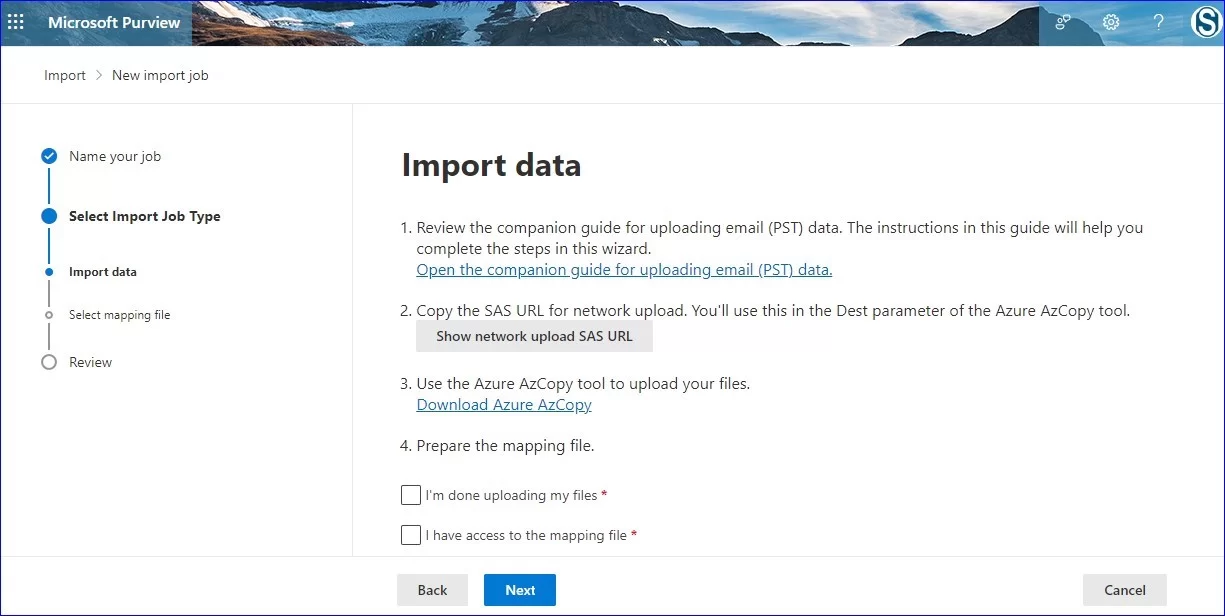
- Next, you will be taken to the import data page, where you will be instructed on some tasks you should follow. The task involves using the Azure AzCopy tool and then, lastly, hitting the Next button.
Method 2- Import PST files into Office 365 with Outlook Application
- To begin with, first open the Microsoft Outlook with Office 365 profile in your system. On the taskbar, hit the file tab>Open and export>Import/Export option.
- The import and export dialogue box will appear there. Choose import from another program or use the file option. After that, hit the Next option to continue.
- Next, the import a file dialogue box will open. Choose the Outlook data file there, and then hit the next button to continue.
- After that, the import Outlook data file will open, and you have to hit the browse option to locate the file you want to migrate. Choose the PST file and hit the open button.
- Now tap on the “Do not import duplicate item” option and click on the Next option. Then, finally, hit the Finish button, and the procedure will be done.
Import PST files into Office 365 using a professional tool.
To commence the task smoothly without affecting your data, users must carefully select the tool to import PST to Office 365, as only some tools will provide you with a complete solution. Several free tools can harm users’ data, so opting for the paid tool is better. Therefore, we suggest Weeom PST for the Office 365 migration tool for the task. Shoviv Software is Weeom Software’s technology partner, and the same tool will be explained in this write-up. Now, if the user wants to know how this tool works, then go through the step-by-step procedure.
- Firstly, download and install the Weeom PST to Office 365 migration toll in your system.
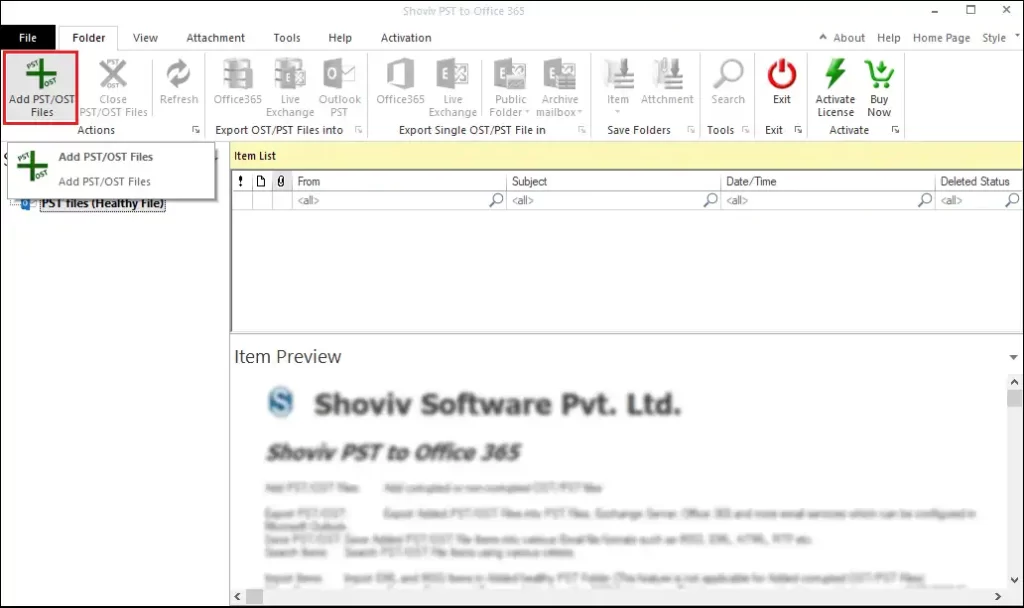
- Now, hit the Add OST/ PST file option from the ribbon bar.
- Next, you are supposed to choose the PST file type from the dialogue box.
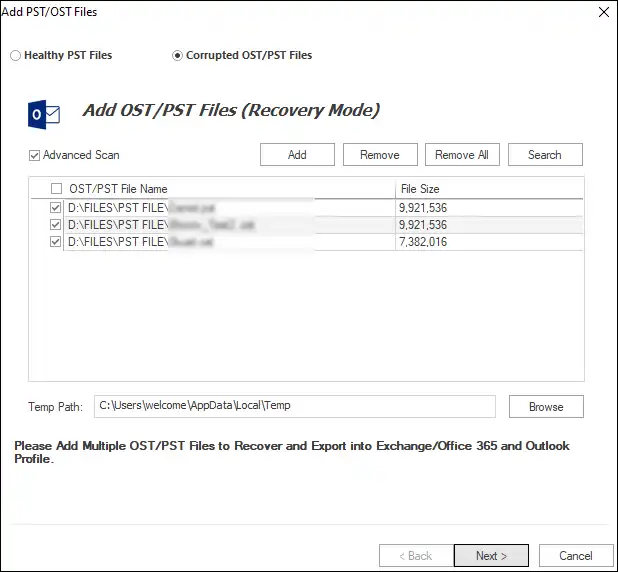
- Post that, hit the Add button and Add/ Search PST file option.
- After that, check the required PST file, hit the Next option, and then you will see the list of the selected files on the left side.
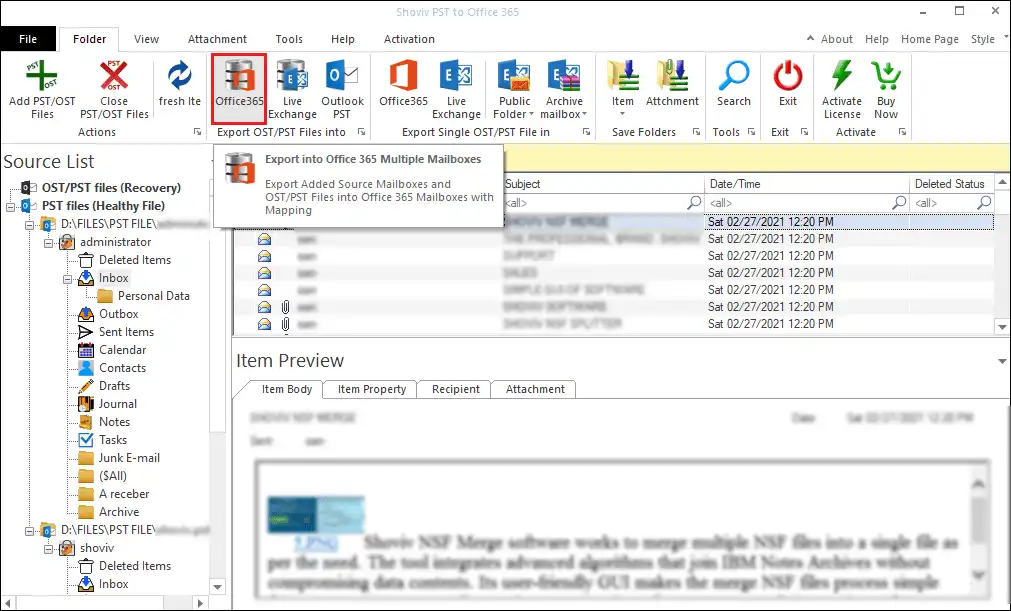
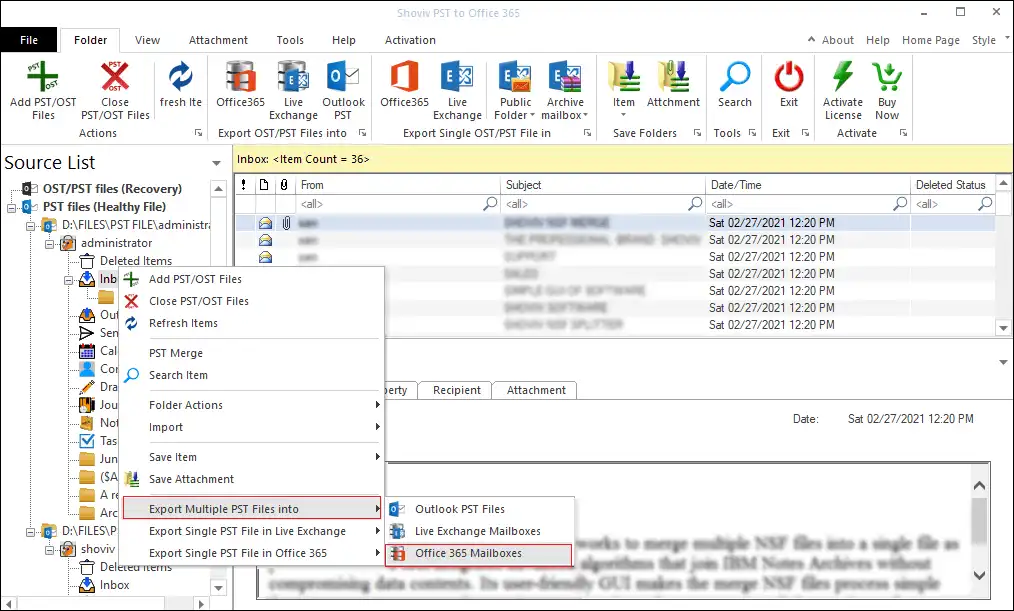
- Now, from the ribbon bar, tap on the Office 365 option, or you can also proceed with right clicking on select the Export OST/ PST files into> Office 365 mailbox.
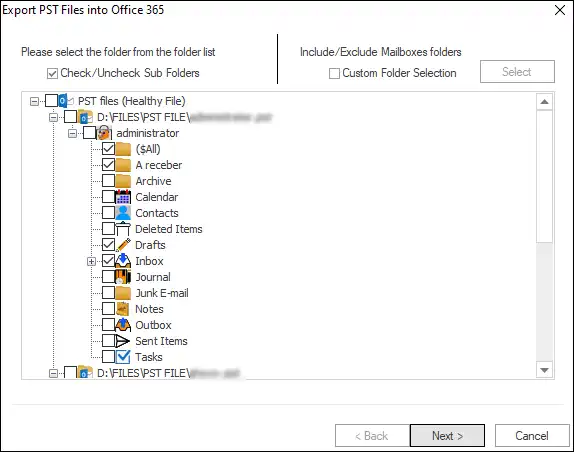
- Now check/Uncheck the subfolders and hit the Next button.
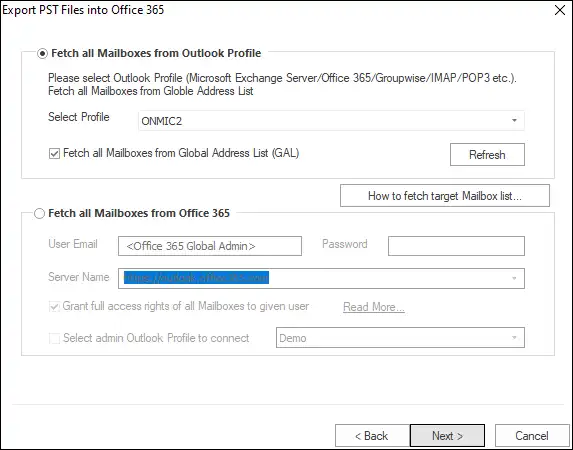
- Afterward, fetch all the mailboxes from the profile option and connect with Office 365.
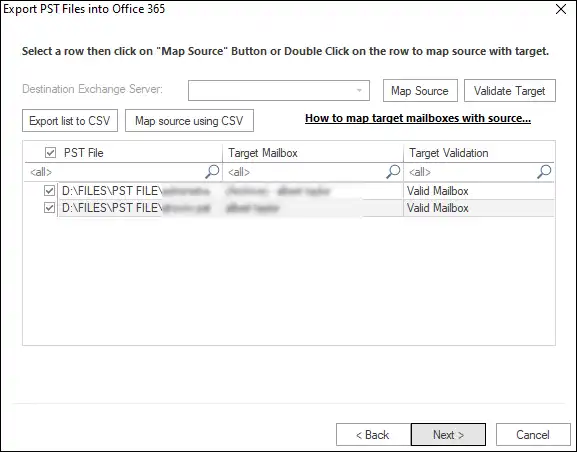
- Map the PST file with the Office 365 mailbox and click Next.
- There will be a filter option; use it as per your preference; users can filter the data based on date range, message criteria, etc.

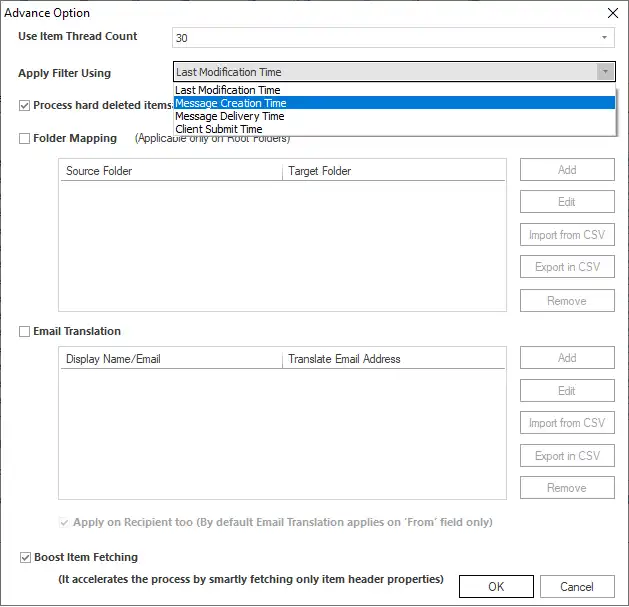
- Next, hit the Advance option for folder mapping and email translation. Then tap on only the item header property to boost the item fetching speed.
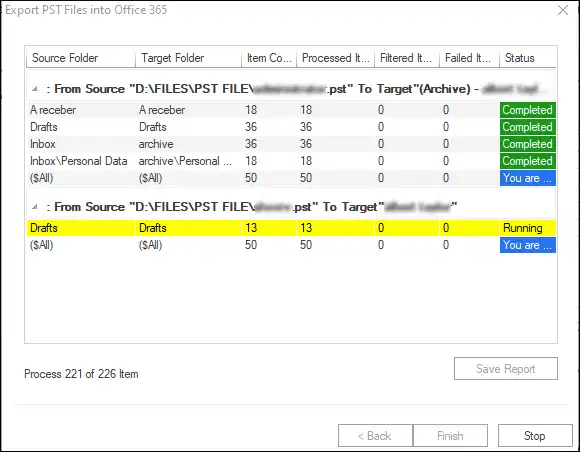
- After that, hit the OK and Next buttons, and the software will import PST to Office 365 as per the settings. After the completion of the task, this utility will prepare the status report of the task.
- At last, hit the Finish option
Deduction
Users who wish to import PST files to Office 365 might find the procedure difficult, but using the stated tool will greatly help them. To learn more about the tool, users can download its free trial version and go through every tool feature before choosing it for the task.