The on-premises Exchange server and Exchange Online (Office 365) equally co-occur with the business organization in the hosted exchange environment. The Exchange server provides this hosted exchange service, and any other third-party service hosts this hosted Exchange. Since Office 365 was launched, every user has been willing to shift their data from a hosted exchange to an online exchange immediately. To begin the task, we suggest to users that the Weeom Exchange to Office 365 migration tool is one of the best tools. One can rely on this tool for the entire process, as the tool will assure users of the proper security of their data.
Office 365 is in high demand nowadays, and not only are businesses using it to store their professional data, but some users are using it to save their data as well. Using Office 365 for business work is very beneficial for organizations as it keeps their data safe and secure for future use. Users have landed on the correct page to get detailed knowledge about the procedure. We will share the best methods, so go through the whole blog and learn everything about them.
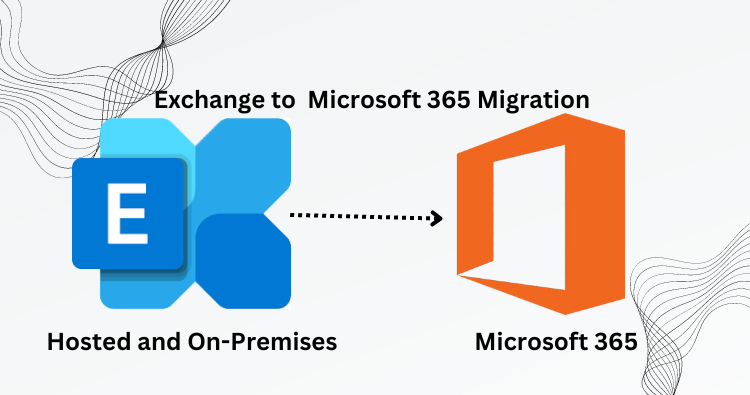
Why do professionals opt for Exchange to Microsoft 365 migration?
Users are impressed with Microsoft 365 amazing security features. This is a boon for many business organizations who are looking for a solution to keep their data protected. Even though many emailing platforms are available for users, users still prefer Office 365. Now, to know why it is so reliable, go through the following benefits for the same.
- Microsoft 365 is very reliable. Users will never face downtime or technical issues. It has the most secure and reliable infrastructure.
- Office 365 secures users’ data with anti-spam and anti-malware and prevents users’ data from any data loss.
- Office 365 is very cost-effective so that anyone can take advantage of Office 365.
- Businesses that work remotely take advantage of Office 365, as users can access their data from anywhere and through any device.
- Office 365 comes with a subscription plan that allows users to store more of their huge data. Users are supposed to purchase the subscription plan and extend the storage capacity of their mailbox.
- This online Exchange can be easily combined with other Microsoft products, such as SharePoint, OneDrive, Teams, etc.
What are the different methods to migrate hosted Exchange to Exchange Online?
Proceeding with the Exchange to Microsoft 365 migration task is tough for users, and to commence the task, users are suggested two ways. Both traditional methods and professional third-party tools are accessible to users so they can opt for their preferred methods. The old method for this Exchange to Office 365 migration task was the manual method; earlier, users relied only on this method. The process is very time-consuming, and users have to be technically knowledgeable while proceeding with the task.
The professional approach is the most used and searched method these days as it gives immediate results and provides positive results. Nowadays, no one wants to wait for long to migrate their exchange data to Office 365, and not everyone is technically inclined. Therefore, with professional tools, every non-technical user and beginner will be able to finish the entire task without misplacing any data. In the following paragraph, we will share step-by-step procedures for both methods.
How to migrate hosted Exchange to Exchange Online
To migrate the hosted Exchange to exchange online, some users still depend on the manual method. Below, we are sharing the step-by-step process for the manual method to migrate hosted Exchange to exchange online, so go through it.
Migrate Exchange to Office 365 with Email Migration Wizard
- To begin the task, first sign in to the Office 365 migration using administrator credentials.
- Now, visit the Admin option and hit the Exchange option.
- Next, hit the migration option and then tap on the add icon (+) and select the on boarding option,
- Next, you are supposed to hit the Remote Move option.
- Later on, click on the Add icon (+) select. users to account and choose the users.
- Now, go to the hosted exchange administrator account, and users should enter the domain name/ administrator.
- Next, users are supposed to create the migration endpoint and then create the migration batches with new names.
- After that, go to the destination domain and target credentials.
- At last, start the batch migration. Once the migration process is completed, users can crosscheck the on-premises Exchange server mailbox.
Migrate hosted Exchange to Exchange online with a professional Approach
All the users who want to get immediate results for this migration task are advised to use the professional tool. Even since the professional tool was introduced, it has made every user’s work easy-going. The Weeom Exchange to Office 365 migration tool is one of the top professional tools that one can rely on.
- To begin the task, download the Weeom Exchange to Office 365 migration tool and install it on your system.
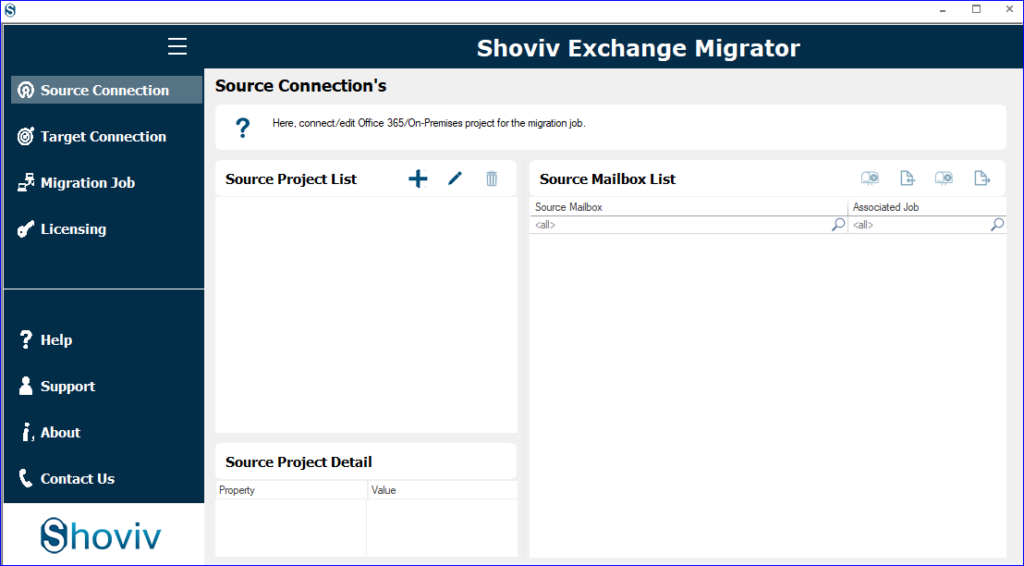
- Next, you have to tap on the source connection option.
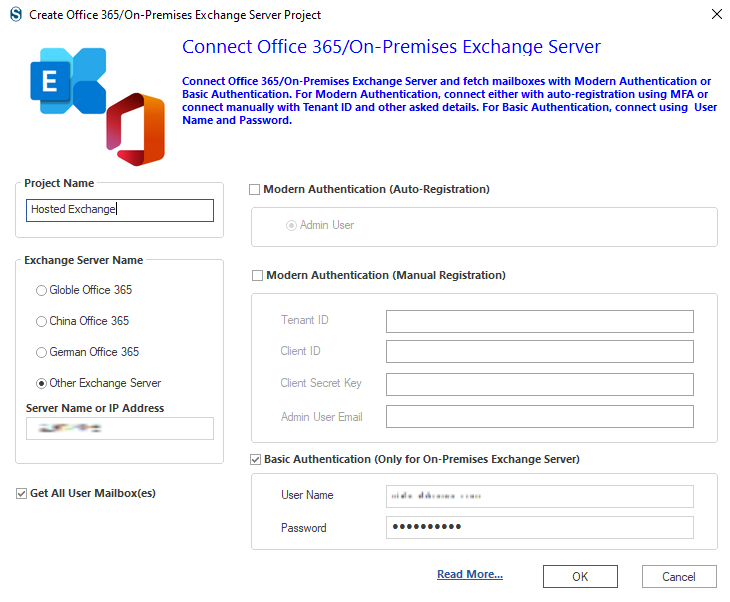
- Now click on the Add icon (+) and enter the project name. Then, fill in your IP address or server name. Then check the Basic Authentication option and enter your username and password> OK.

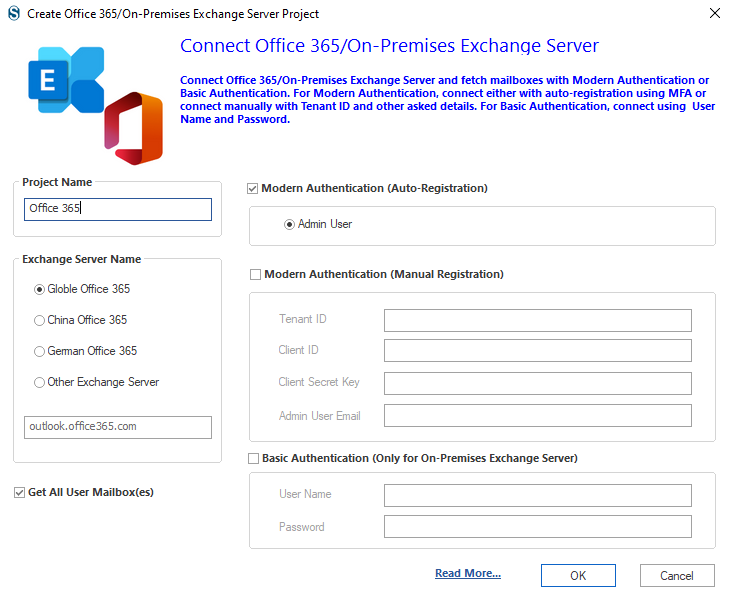
- Post that, hit the target connection and then on the (+) icon to generate a new one. Now, enter the project name, choose Globe Office 365, and hit the modern authentication option. Later on, tap on the OK button.
- Now tap on the migration job option and choose the mailbox that you wish to migrate.
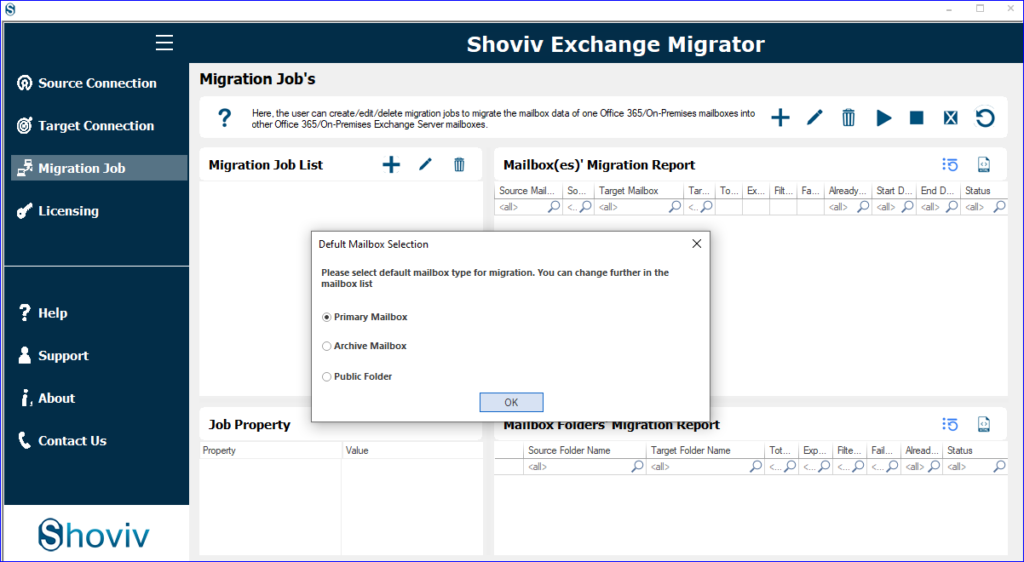
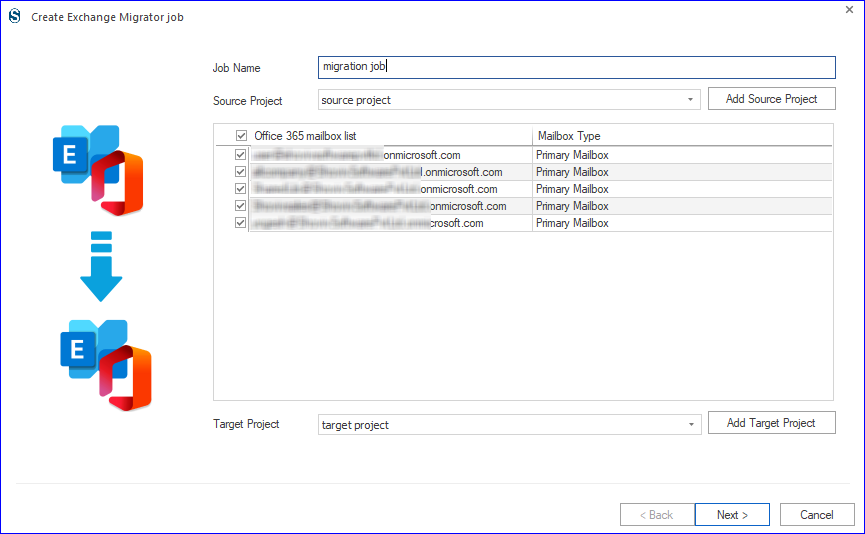
- Afterward, click on the Add option, fill in the job name, and select the mailbox list. Next, add source and target and tap the Next option.
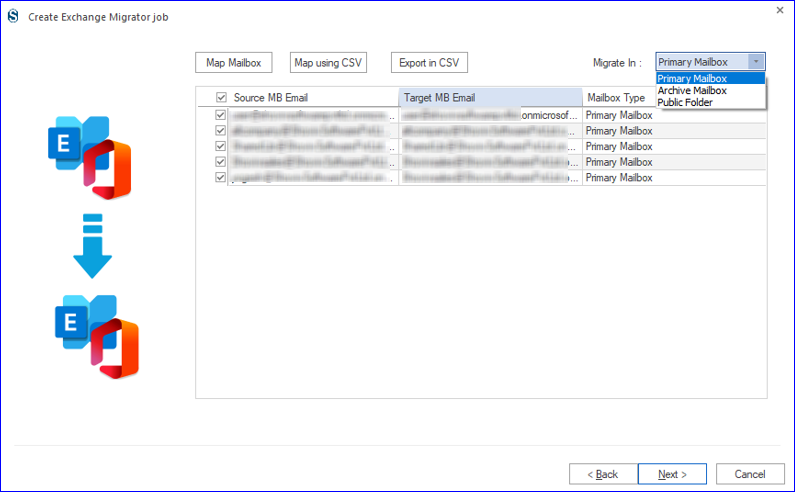
- Later, users have to map the source mailbox to the target and then select the mailbox type to which they want to migrate the mailbox in the migration option. Then, they hit the Next option.
- There is a filter option for users to select the folder according to their preference for the migration process. Then, to proceed, they hit the Next button.

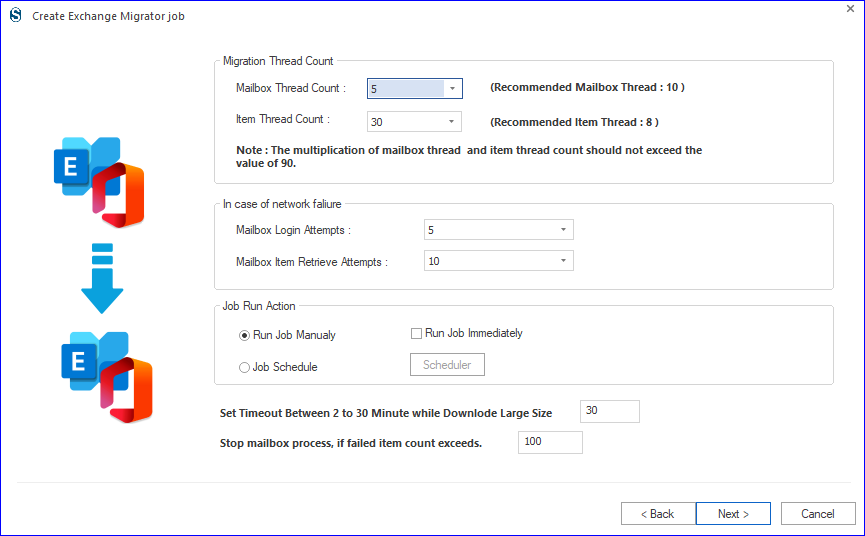
- On the next page, users are supposed to make changes according to their requirements and then click the next option.
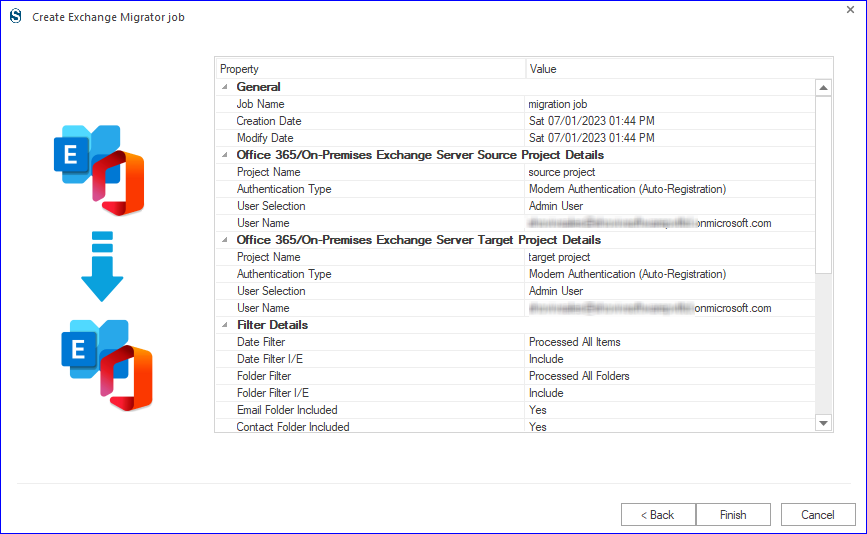
- Lastly, users can hit the finish option and begin the migration task whenever they want.
Ending
If users want to migrate hosted Exchange to Exchange online, they should use a professional tool. The software offers a free demo version so that users can explore its features in detail.