Microsoft 365 is a cloud-based business communication platform that most users rely on to share or transfer data. Exchange 2019 has been the most used platform, and everyone uses it to secure their data. Now that Microsoft has launched Office 365, every user is willing to migrate Exchange 2019 to Office 365 as soon as possible. To begin the task, the Weeom Exchange to Office 365 migration tool will be the best option for the users. We recommend every user commence the task with the specified tool to get picture-perfect results.
Those who are regular users of Office 365 are well aware of how beneficial it is to go with this migration process. Many email clients are available for users, but everyone opts for Office 365 as it has advanced security features that will help the users keep their data protected for future use.
Advantage of migrating Exchange to Office 365
When thinking of reasons for this migration, a lot of reasons came across that will keep users’ data protected for future use. Although Exchange is the top emailing platform, many depend on on this tool. Nevertheless, Exchange is not cost-effective; its security has also started degrading, costing every user a lot. Data is a crucial asset for any user, and no one wants to lose it. Here, we share the advantages of the same.
- Office 365 offers a subscription plan; with this, users can extend their storage capacity. This will create more space in the mailbox, and users will be able to store as much data as they want.
- Office 365 is very cost-effective, and users do not have to spend much. Users have to purchase the subscription plan, and all the other facilities will be provided.
- With Office 365, users will get astonishing security features that protect their data. Users can be assured they will be protected from data loss, virus attacks, or technical faults.
- One prime concern for users is to keep Office 365 updated to the newest version. Now, users do not have to worry about the same thing; as with Office 365, it automatically updates the data to the latest version.
What are the different techniques to migrate Exchange 2019 to O365?
Users are offered two techniques to commence the task: manual, old-school, and professional third-party tools. One is the traditional old way, and the other is the technically updated way to finish the process in a single go. Since a professional third-party tool has been launched, users are going with a professional method to migrate Exchange 2019 to Office 365 as soon as possible. With skilled tools, users can finish tasks quickly, whereas manual methods will take time. Users can choose their preferred method for the task, and we will share the steps for both methods in the following paragraph.
Why do professionals use third-party tools?
Choosing a professional tool to migrate Exchange to Microsoft 365 will benefit users. This is because the task will be completed successfully without harming the data; now, it is up to users which tool they choose. Opting for the tool is challenging for the users, so we suggest one of the best tools. The Weeom Exchange to Office 365 migration tool will be the best choice for users.
- The tool will instantly recover the private and public EDB files.
- Users will be able to export various mailboxes from source to target.
- There is a filter option for users to filter the data based on date range and message class.
- The automatic and manual folder mapping option allows users to migrate from subfolders to the target folders.
- It will enable users to migrate the source mailbox to Outlook PST.
- Users can search for a specific item from the add mailbox with the help of the search option.
- There is an incremental export option to resume their interrupted process.
- The software will effortlessly migrate Exchange to O365 without consuming much time.
Migrate Exchange 2019 to Office 365 with a professional tool
Now that users are well aware of both methods and are willing to use the professional tool, Users are suggested to choose the Weeom Exchange to Office 365 migration tool. The utility will simplify the whole procedure and not cause users to worry about their data security. Following is the step-by-step procedure for the users, so go through it once.
- First, install the Weeom Exchange to Office 365 migration tool in your system.
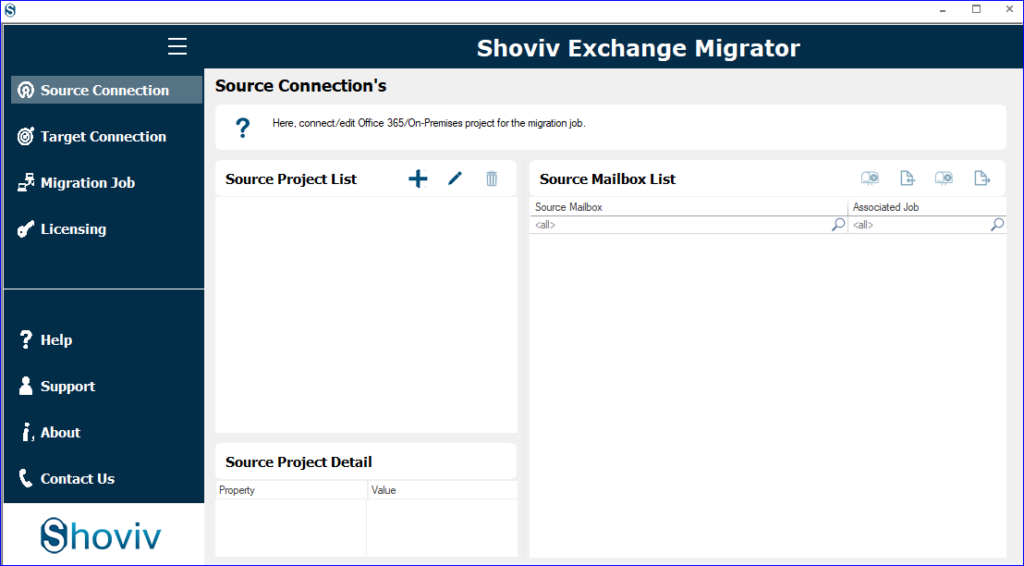
- After that, hit the source connection option.
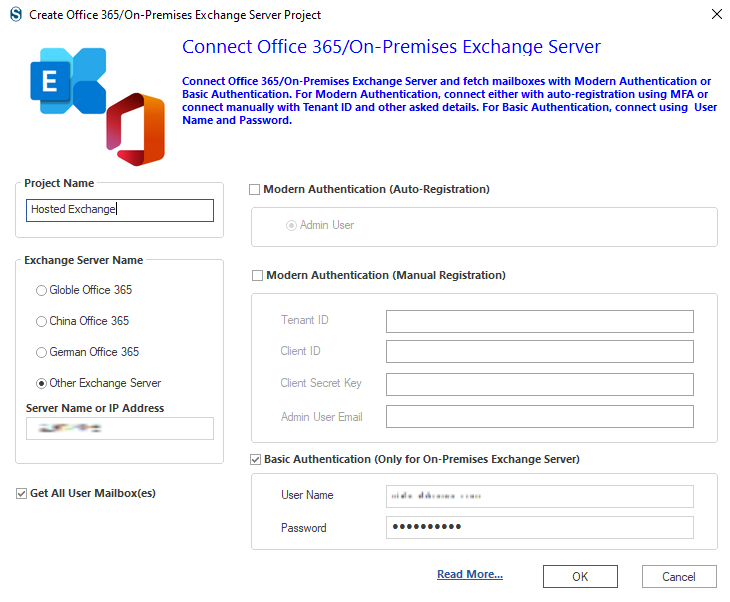
- Now tap the (+) button and enter a project name, choose the other Exchange Server option and enter the IP address or server name. Now check the primary authentication option by entering your name and password and hitting the OK button.

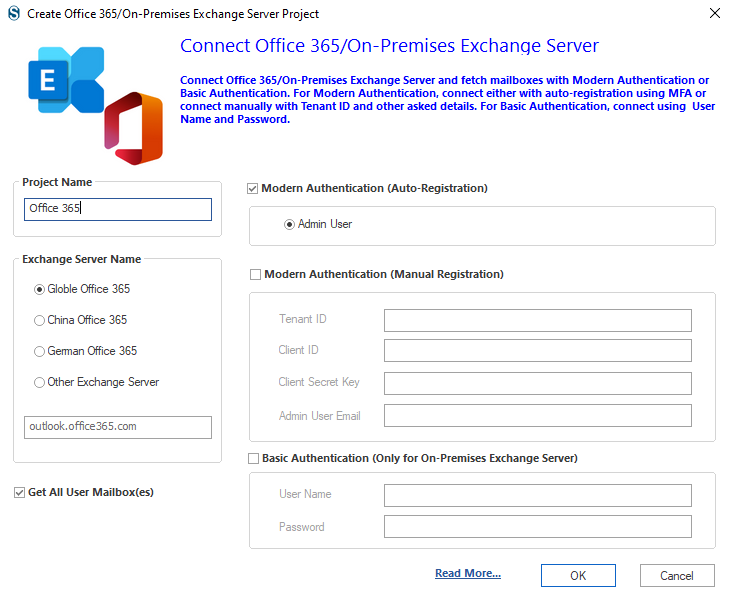
- On the next page, click on the target connection and create a new one by tapping the add icon (+). Now enter a project name, choose globe office and then choose the modern authentication option to move further. Then, hit the OK button.
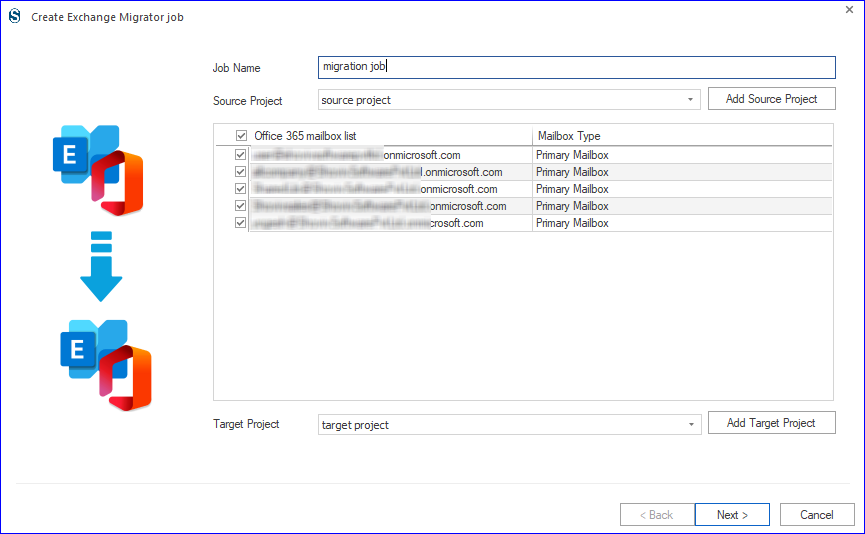
- Next, you are supposed to click the migration job and choose the mailbox you want to migrate.
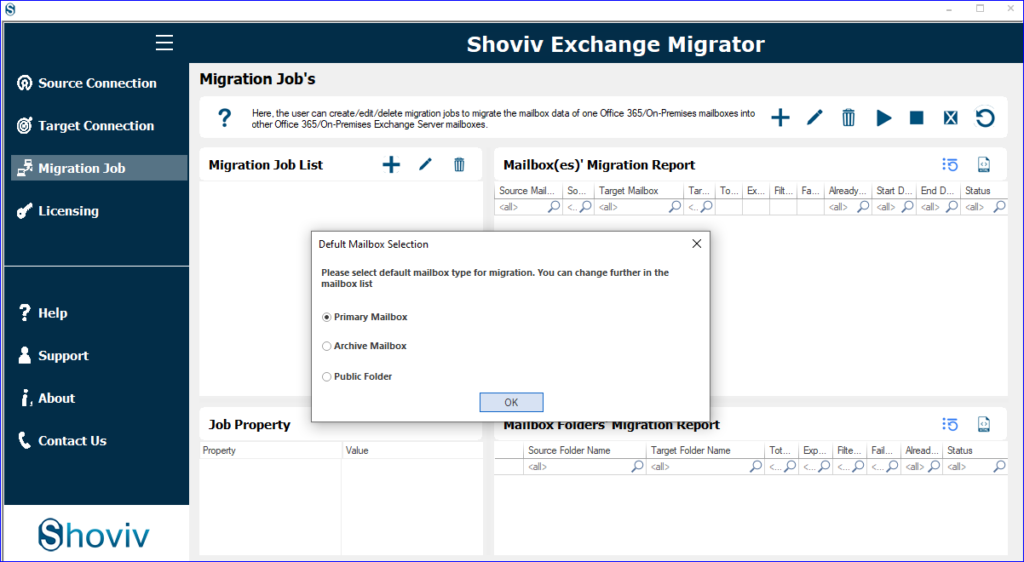
- Tap the (+) option, fill in the job name, and choose the mailbox from the list. Now add source and target and tap on the Next option.
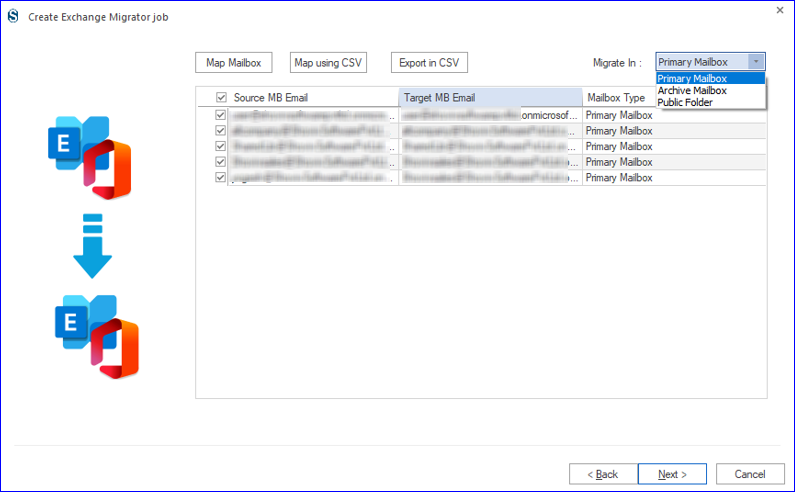
- After that, you have to map the source mailboxes to target select mailbox type where you want to migrate mailboxes and hit the Next button.
- Next, there will be a filter option so users can include/ exclude the desired file for migration and hit the Next option to move further.

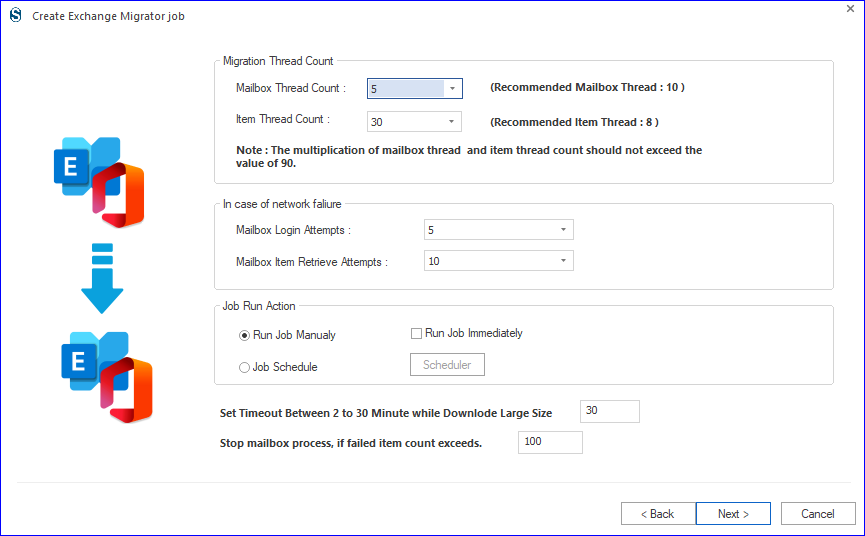
- Now, users can make changes per their requirements and hit the next option.
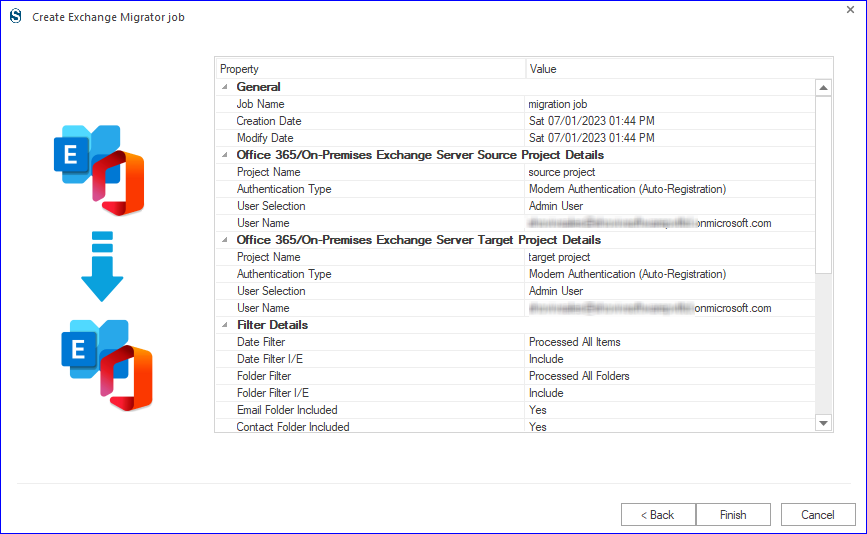
- Lastly, hit the Finish option, and the migration procedure will start. Users can download the status report of the entire process and save it for future reference.
Migrate Exchange 2019 to O365 with the traditional method
Technical experts can only handle the task manually as it is time-consuming. A person with immense technical knowledge can initiate the procedure, so here we are, sharing the steps to commence the migration task.
Migrate Exchange 2019 to Office 365 using email migration wizard
- Sign in to Office 365 by entering the administrator credentials.
- Click the admin option, then on the Exchange option.
- Post that, hit the Migration option and then on the Add icon to select New.
- Now tap on the Remote move option.
- Tap the add icon (+) to choose the user’s account option.
- Next, there will be a hosted administrator account, and the user name will be entered as domain name/ Administrator.
- Afterwards, users are supposed to create the migration endpoint and the migration batch with a new name.
- Next, users are supposed to provide the target credentials and destination domain.
- Lastly, begin with the batch migration.
- Once the procedure is completed, crosscheck it.
Finish
If users want to migrate Exchange 2019 to Office 365, they should use the tool mentioned above. The software will perfectly migrate the data without making any changes to the content. Thus, it will guide all users throughout the task so that they can smoothly finish the whole procedure.