In this write-up, we are gonna cover the best practice to migrate Exhange mailboxes to Office 365 and for Office 365 to Office 365 migration. If you also want to know them, stick to the end.
Office 365 is a cloud-based Software as a Service and is becoming prominent in its respective criteria. The reason for its popularity isn’t hidden. The top thing about this service is its flexibility. From being accessible from anywhere to flexibility in its pricing, this service covers small firms as well as the tech giants.
Features of Office 365:
- It is accessible from anywhere at any time.
- You do not need to save files on your local directory.
- Subscription of Office 365 is availed on the basis of the size of the firm and hence proves flexible.
- You are not required to go down-time to update it; it remains updated every time you use it.
- It saves the newly added data automatically, and therefore you don’t have to worry that you forgot to save the changes.
There are many more features of Office 365, and it would be sufficient to say in its answer that it is a product of tech giant Microsoft itself.
How to Migrate Exchange to Office 365 Migration:
There are various methods for this task. In the manual method itself, there are Three Ways. These three ways are Hybrid Migration, Cutover Migration, and Staged Migration. But these ways aren’t suggested because they are generally complicated, and sometimes even a well-versed person also stucks in them. A few times, data loss also becomes an issue.
I would suggest you use an automated Exchange to Office 365 Migration Tool because the data is something crucial on which the businesses build. When I talk about the third-party tool, the Weeom Exchange to Office 365 migration tool is one that I prefer you to use. This is because it is a diversified solution to migrate Exchange to Office 365.
Migrate to Using Exchange to Office 365 Migration Tool?
It is a technically complex procedure to migrate Exchange to Office 365, but Weeom makes it simple. Its GUI is simple that even novice interacts with this tool, and the problem of complexity solves here. We will discuss Office 365 migration from Exchange and Office 365.
Exchange to Office 365/Office 365 to Office 365 Migration:
We will cover both the Exchange to Office 365 migration and Office 365 to Office 365 migration together. This is because both the processes are somewhat the same except in adding the source.
Firstly, Download the Exchange to Office 365 migration tool from the Weeom official website. Install it on your system and then open it to proceed with the migration task as follows:
Steps by Step Migration from Exchange emails to Office 365:
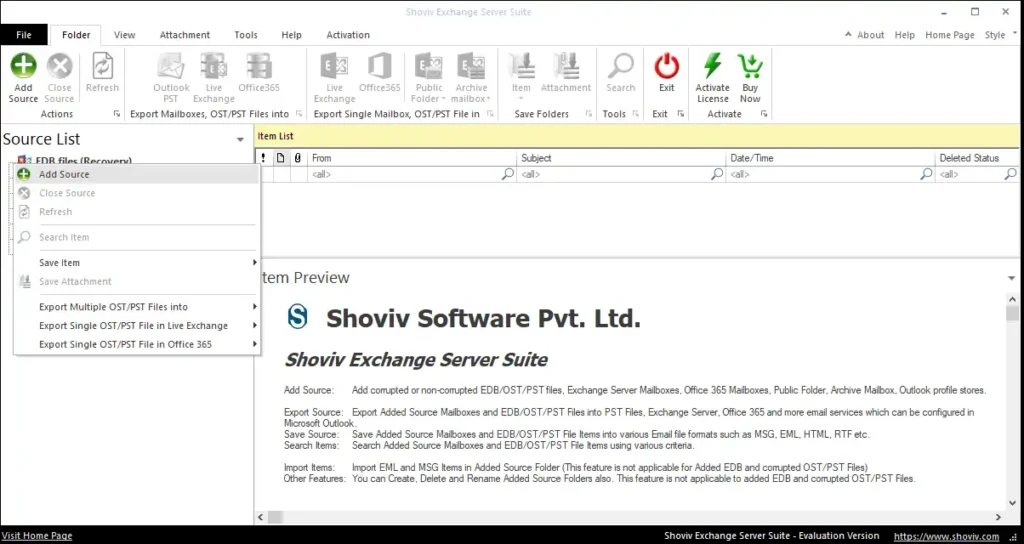
Add Source:
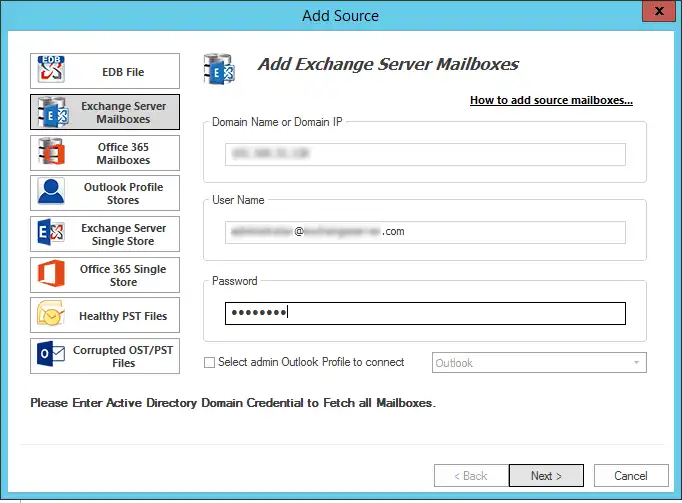
- Click on Add Source from the ribbon bar. A wizard will appear, hit Exchange Server Mailboxes/Office 365 mailboxes from the left pane, provide essentials, and hit Next.
- (If you want Exchange to Office 365 migration, hit Exchange Server Mailbox. For Office 365 to Office 365 migration, choose Office 365 option.)
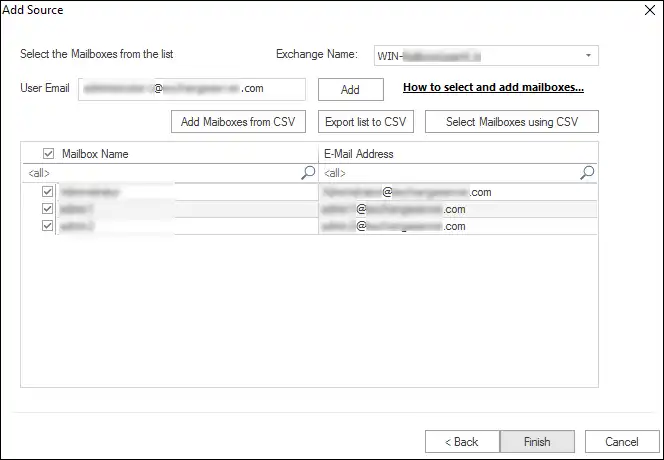
- The tool will fetch all the mailboxes of the respective account; if any mailbox is missing, add using Add button, check the checkboxes of the mailboxes to add for migration, and hit Finish.
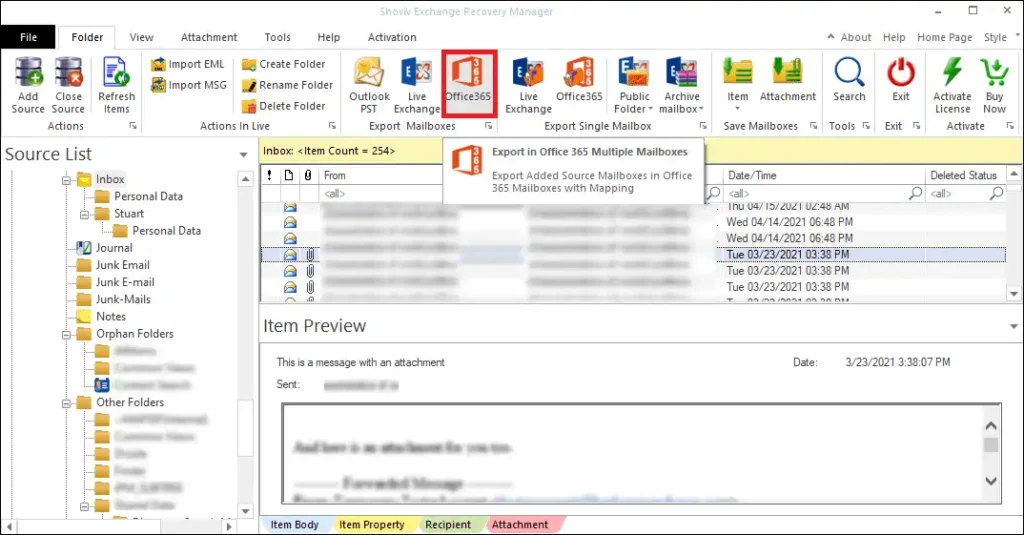
EXPORT TO OFFICE 365:
To migrate Exchange to Office 365 and Office 365 to Office 365, this phase goes the same.
- Click on Office 365 from the Export mailboxes group on the ribbon bar.
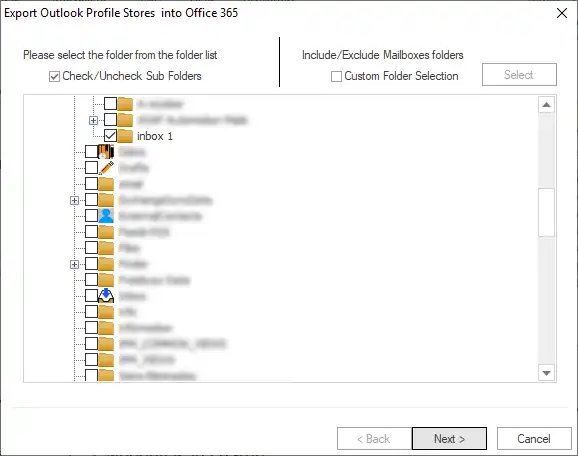
- A list of sub-folders will appear, check-uncheck them accordingly, and hit Next.
- Now click the radio button: Fetch all Mailboxes from Office 365, enter credentials, and hit Next.
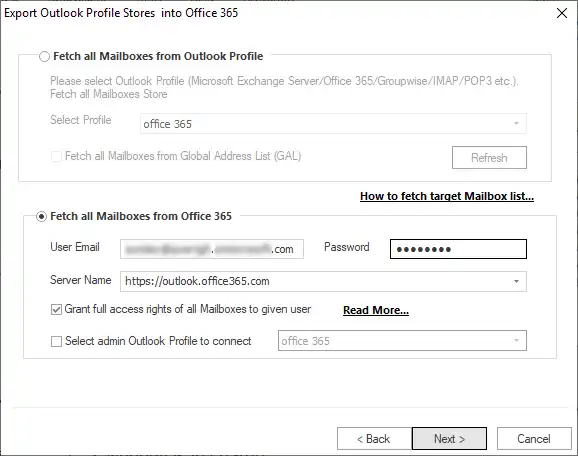
(If you have your Office 365 Outlook profile configured, then you can also click on Fetch All Mailboxes from Outlook Profile and choose your profile to proceed.)
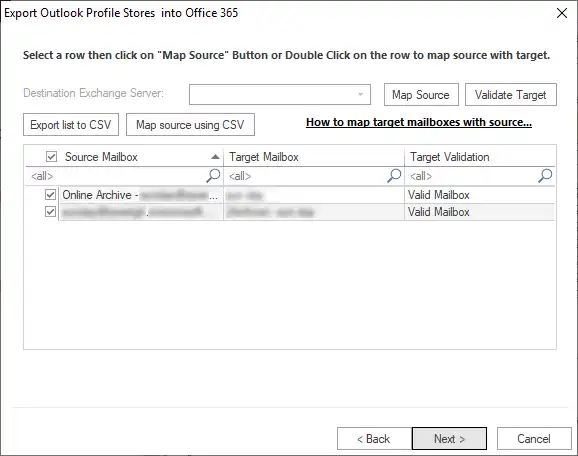
- Now map source mailbox with the target and validate the target using the Validate Target button and consequently hit Next.
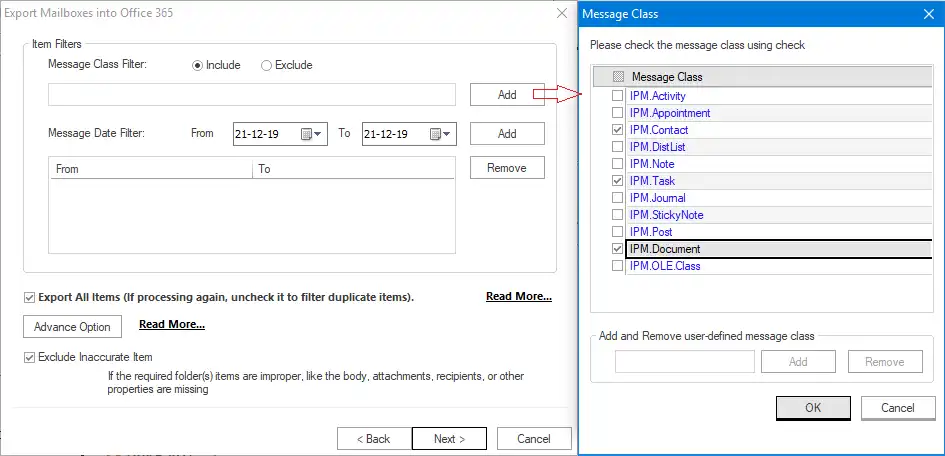
- Use filters based on message class and date, check Export all items or skip it to keep duplicate items or prevent them, respectively, and hit the Advance Option tab to jump into it.

- Use thread count, folder mapping, email translation kinds of options and hit OK to come back to filter wizard and subsequently hit Next to proceed.
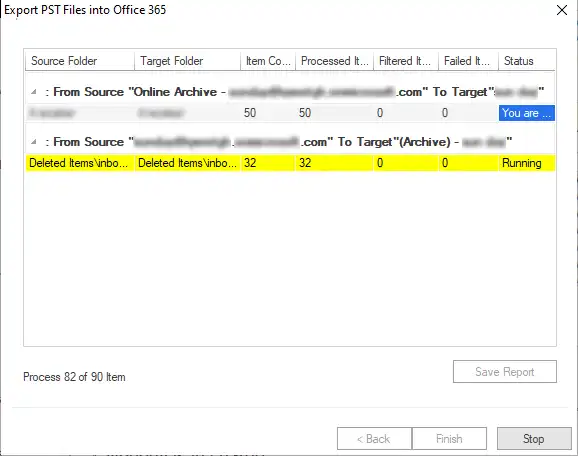
- The process will start; you can save the report and hit Finish when the process gets completed.
Some of you may be puzzled about the Office 365 to Office 365 migration? Actually, Office 365 to Office 365 migration is the migration of vast data from one Office 365 mailbox to the other.
Have you seen how effortless Weeom Exchange to Office 365 Migration tool made this technically complex process? The Weeom Tools migrates old Exchange versions too; for instance, you can even perform Exchange 2010 to Office 365 migration. Now let us elaborate on the features of this tool that you may have already noticed in its procedure.
Noticeable Features of The Tool:
- Unaltered Migration: This tool allows you to migrate Exchange to Office 365 as well as Office 365 to Office 365. It retains the folder hierarchy and keeps the data in its original form.
- CSV File: You can add mailboxes and perform the folder and mailbox mapping using the CSV file.
- Archive Mailbox Migration: Weeom tool also allows users to migrate public folders and archive mailboxes. This is the feature that other tools rarely provide.
- No Limit on Size and Number of Files: There is no restriction on the limit of adding mailboxes. You can add as many mailboxes in one attempt as you like to migrate. Apart from this, there is no restriction on adding large mailboxes; you can add as big mailboxes as required.
- Preview Item:This tool offers a preview feature. You can see mailboxes on this tool to see items and their details. This feature proves handy when you want to get assured of the mailboxes you added.
- Search Option: If you want to open a specific item from the several added mailboxes, you can firmly search it on the Weeom tool. You can use these criteria; Message class, Date, Subject, Cc, Bcc, Attachment date, et cetera to search any item. This feature saves your time and effort as well.
- Advanced Options: It is provided in this tool to let you perform email translation and folder mapping kind of significant options. Email translation helps to replace the canonical mailbox address with the legit mailbox address. Folder mapping ensures a more accurate migration.
- Incremental Export: This feature’s work is to prevent duplicity and presume the process in a case started after some interruption. This functionality will not operate unless you uncheck the Export All Items option.
Note: Only works when target folder and folder mapping remain unchanged.
Conclusion:
There are many small to big features embedded in Weeom Exchange to Office 365 Migration tool to migrate Exchange to Office 365 effectively. But you can experience listed features as well as unlisted ones for Free. YES! You heard it right; you can use this tool for free in its free demo version. This demo version allows you to process the first 50 items per folder. It would be better to experience the tool prior to its purchase to check its efficiency.